24 June 2013

Dog Food - Make your own recipe


Picture
A homemade dog food diet is an excellent, healthy alternative to commercial kibble. Homemade dog food can help promote health and well being in your four-legged family members by providing real food, wholesome nutrition and freshness you simply cannot get with kibble diets. Making your own dog food is easier than you think, and can also be quite inexpensive! Purchasing your meat on sale and buying bagged frozen vegetables will be cheaper than buying a high quality kibble!

This free homemade dog food recipe is balanced and complete to AAFCO (Association of American Feed Control Officials) standards. A complete whole food multivitamin is ESSENTIAL to every homemade recipe to replace any nutrients lost in the cooking process. To get my entire collection of balanced homemade dog food recipes, check out my Homemade Dog Food Recipe eBook!

Picture
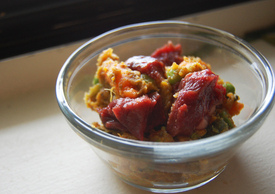
Beef and Sweet Vegetables

INGREDIENTS


  • 550g boiled beef liver
  • 1 cup unsweetened applesauce
  • 1 cup of boiled sweet potato
  • 1/2 cup of boiled green beans
  • 1/2 cup of boiled peas
  • 1/2 cup of boiled carrots
  • 1/4 cup of 2% fat cottage cheese
  • 2 tablespoons of extra virgin olive oil
  • 1 1/2 scoops of Nupro Gold Supplement

DIRECTIONS

  1. Chop the beef liver into small pieces and boil until cooked. (Do not overcook!)
  2. Boil sweet potato, green beans, peas and carrots until tender.
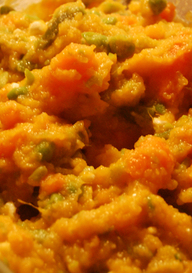
  3. In a large bowl add the sweet potato, green beans, peas, carrots, applesauce, cottage cheese and extra virgin olive oil. Mash it all together and mix well.
  4. Add the boiled beef liver to the mash, mix it in.
  5. When the food cools, add 1 1/2 scoops of the Nupro Gold supplement.
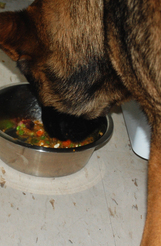
  6. Serve!

Picture FEEDING GUIDE FOR THIS MEAL
  • 10 lbs - 208g a day
  • 20 lbs - 350g a day
  • 40 lbs - 589g a day
  • 60 lbs - 798g a day
  • 80 lbs - 991g a day
  • 100 lbs - 1172g a day


Conversion for grams to cups:
Conversion Chart / Table

gram to cups Conversion Chart / Table: cups to grams Conversion Chart / Table:
g = c
1.0 = 0.00423
2.0 = 0.00845
3.0 = 0.01268
4.0 = 0.01691
5.0 = 0.02113
gram = cups
6.0 = 0.02536
7.0 = 0.02959
8.0 = 0.03381
9.0 = 0.03804
10  = 0.04227
c = g
1 = 236.58824
2 = 473.17647
3 = 709.76471
4 = 946.35295
5 =1182.94118
cups = grams
6 =1419.52942
7 = 1656.11766
8 = 1892.7059
9 =2129.29413
10=2365.88237


Want more balanced and complete recipes? Check out my eBook: Homemade Dog Food Recipes

Don't forget to like K9 Instinct on Facebook to get new blog article updates and other dog tips!

Angel
K9 Instinct
www.k9instinct.com


22 June 2013

Apricot Nectar

Apricot Nectar

 Sorry Jennifer I have taken so long to post this but canning season is in full swing at my house so everything else takes a back seat.

Apricots are a weird fruit to me.  People either like them or hate them.  

I think there is so much hate involved because if you have a apricot tree that is within a 5 mile radius of your house those "neighbors" will try to pawn their fruit off on you.  I guess we should link apricots with the quote of "if you have a apricot tree you can feed a nation" (okay not really but your entire neighborhood!).

Apricots are like zucchini in that way, there is always a million of them and you never know what to do with them because after eating them all day long for 2 weeks straight, you kinda get sick of them and nobody wants to take them off your hands.

Except me.  At least a few bucket loads because even I can only handle so much of these little beauties.

We like apricot jam a little bit at our house so one or two batches gets jamified but we L.O.V.E. apricot nectar.  Isn't it beautiful in the jar?  I love how brilliant orange it gets and it is delicious.

This is my grandmother's recipe and we grew up drinking this juice.  We always mixed it with orange juice or orange koolaid but it's totally up to your preferences, I just know that it's awesome to drink and quite easy to can (as far as canning things goes anyways...) so if you have a apricot tree near you give it a try and because in my neck of the woods people will let you have as many apricots as you want for free.  Sweet!

And if you have never canned before, read this post first.  It's a great introduction to canning.

Apricot Nectar


Apricots (a 5 gallon bucket produce about 10-12 quarts of juice)
Water
Sugar
Lemon juice
Water bath or steam canner
Canning jars, sterilized (I send them through a cycle in the dishwasher)
New lids
Rings
Chinois Strainers(we just called it a sieve growing up) (possibly like Mom's Food Foley?)


1.  Wash all your apricots and remove pits.  Put apricots in your large thick bottomed pot--very important because you don't want the bottom to burn.  For every 4 cups of apricots you put in, add 1 cup of water. Let sit at a gentle boil until apricots are very soft--I let mine sit 3-4 hours or longer.

2.  After your jars have been sterilized, fill each one with 1/2 cup sugar and 1 Tbsp. of lemon juice.

3.  When the apricots are soft, set up your sieve (or chinois) over a bowl to catch all the juice.  Gently pour several cups of the apricot/water mixture in your sieve and using the pestle push the mixture all around trying to get out as much juice as possible.  Pour juice into jar, filling up to the neck.  Dump out remains of apricots in separate bowl.  Using a wooden spoon stir juice until sugar dissolves.  Repeat until apricot/water mixture is gone.

4.  Top each jar with a lid and ring.  Process for 20 minutes according to manufacture's instructions.  Enjoy!
 
 
Here's a Chinois:


Fox Run 3-Piece Stainless-Steel Chinois Set

by Fox Run

List Price: $49.99
Price: $34.25 & FREE Shipping. Details
You Save: $15.74 (31%)


In Stock.
Ships from and sold by Amazon.com.
 
 
(Here's the Printable version)
 
Apricot Nectar
(www.thefarmgirlrecipes.blogspot.com)
Apricots (a 5 gallon bucket produce about 10-12 quarts of juice)
Water
Sugar
Lemon juice
Water bath or steam canner
Canning jars, sterilized (I send them through a cycle in the dishwasher)
New lids
Rings
Chinois Strainers(we just called it a sieve growing up)
1.  Wash all your apricots and remove pits.  Put apricots in your large thick bottomed pot--very important because you don't want the bottom to burn.  For every 4 cups of apricots you put in, add 1 cup of water. Let sit at a gentle boil until apricots are very soft--I let mine sit 3-4 hours or longer.
2.  After your jars have been sterilized, fill each one with 1/2 cup sugar and 1 Tbsp. of lemon juice.
3.  When the apricots are soft, set up your sieve (or chinois) over a bowl to catch all the juice.  Gently pour several cups of the apricot/water mixture in your sieve and using the pestle push the mixture all around trying to get out as much juice as possible.  Pour juice into jar, filling up to the neck.  Dump out remains of apricots in separate bowl.  Using a wooden spoon stir juice until sugar dissolves.  Repeat until apricot/water mixture is gone.
4.  Top each jar with a lid and ring.  Process for 20 minutes according to manufacture's instructions.  

How To Build A Worm Tower

How to Build a Worm Tower
A few years back we put this short video clip up on YouTube with Permaculture Schools Gardening expert Leonie Shanahan talking about her worm tower. Well the idea seems to have caught on as little colourful worm towers are now springing up everywhere in the Permaculture landscape. While filming a segment with Geoff Lawton recently in his “Soils” DVD we saw an interesting variation that was built into a tank garden laden with vegetables. Some people are worried about using PVC pipes and the one we filmed was made of a heavy concrete pipe construction. It was laden with thousands of Compost Worms and the vegetables grown were bursting at the seams with goodness. So how do you do it?

Here’s a basis rundown on how to build your own Worm Tower.
First secure yourself a tank garden. The one we filmed was made of zinc aluminum but any type will suffice. You could make your own from stacked timber sleepers or concrete slabs.
Fill the tank with soil or create your own soil from filling the tank with newspapers, cardboard, garden clippings and alternating the layers with rotted compost or manure. Eventually the whole thing will turn to compost anyway but may take some time. As Geoff Lawton says “If its lived before – it can live again!” That makes good advice for what you can use in your container garden tank.
Find a large 3 to 4 foot pvc or concrete pipe. The wide 12 inch concrete pipes are ideal. PVC is okay but check to see that it is food grade. We don’t want any chemical nasties leaching out.
Bury the tower about half way down in your tank garden. Half of the tower should be sticking out.
Empty a bag of manure into the tower, filling the tower half way up the pipe. Any sort of animal manure is fine. Horse, cattle, sheep or chicken is perfect. Geoff Lawton favours mixing your manures as this gives your system a “high octane” blend that will have your microbes jumping for joy. Good soil bio-diversity is always a good thing!
Introduce your compost worms into the tower. A small bucket of worms can house easily more than 1000 red wrigglers. Do not use normal garden worms as these are usually a different sort of worm that are more solitary creatures and wont do the job that composting worms are able to achieve so well.
Throw in your garden scraps and secure over the pipe a removable container. Worms don’t like the light so give them a comfortable home to live it. You can also throw some shredded moist cardboard into the tower or straw or raked up garden leaves. Worms love to chomp on rotted cardboard. Keep your tower moist but not too wet.
The compost worms will get to work on the manure and come up at nibble on the vegetable scraps. As long as they have a food source left in the tower they will turn the animal manure and vegetable scraps into high quality worm castings and worm juice that the plants will love to eat. They wont escape either unless you stop feeding them. The worm castings will leach out into your tank garden and you will be feeding your plants from the roots up. A beautiful elegant solution to creating sustainable abundance.


Rain Water Catch System

Here's a photo of our setup, 4 of the square 50-gallon Rubbermaid barrels, set up on cement blocks and planks. We found some PVC parts to use to link them -- you can buy linking kits, but the tube seemed too small to handle the water flow -- and can easily disassemble them for winter storage. There's a runoff pipe on the 4th (right-side) barrel that empties into a runoff drain. (In the photo there's a piece of board sitting on top of the drain, everything wasn't quite finished when I took this pic.)

The tops have a window-screen type of insert that keeps most debris and such from getting into the barrels, although the granules from our roof shingles can get through. There are short hoses coming off the bottom of each barrel, which make it easy to fill watering cans; for direct watering on the garden we've been using a small pump, which is kind of a hassle and I think we might try adding an extra row of the cement blocks for a little more height next year, in hopes of being able to use the soaker hoses directly from the barrels.


Thumb of 2011-11-13/Weedwhacker/7e0f83

How To Kill Squash Bugs

~How To Kill Squash Bugs, Squash Bug Eggs, and Nymphs~


Most of us who are growing a garden right now can commiserate with one another over persistent problem of squash bugs (otherwise known as leaf-footed beetles or stink bugs) ravaging our summer squash, pumpkins, cucumbers, and winter squash.

Until now, we've been doing one on one battle with the adults. And it's not an easy battle to win. For the gardener growing organically, rather naturally (not wanting to use even organic pesticides to upset the natural balance of the soil or inadvertently harm the beneficial insect population) this means lots of picking and squishing or drowning of the adults.

But the tables are about to turn and our problem is about to grow exponentially because it's hatching season.

The few wily ones that have outwitted us have been laying their beautiful, jewel-like, golden or ruby eggs on the underside of the host plants leaves and they are getting ready to hatch. In fact, where yesterday there were none, today I found several batches had hatched.

{Eggs & Nymphs}

Last year, I picked the eggs off with fingernails, getting the eggs stuck under there and often tearing the leaves in the process. My plan for this year was to be on the look out for the soft-bodied nymphs and squish them as they hatched.

But this morning while chopping potatoes for frying to serve with some scrambled eggs, I finished up listening to a Farm Dreams podcast I had started and Liz mentioned that she managed the eggs with a roll of duct tape.

I dropped my oily spoon and ran for the barn, grabbed the duct tape, and headed to the garden where I experienced for myself the genius of this idea.


I've saved my plants this morning from literally hundreds of these little monsters and myself from hours of picking! It was truly shocking- and the ones on the pumpkins in with the corn... I would never have found all of those nymphs. Not in a million years. I feel like I may have stopped this cycle dead in its tracks with less than an hour's work. 

A few things to note:
-It is trickier to get the eggs when they have been laid in a corner of the large veins, so I got what I could and the few remaining I picked off with a fingernail. 

-Be gentle. Some of the pumpkins had soft leaves and a bit of the leaf came off with the eggs. Not much and not often. 

-If you see a squash beetle adult, nab her! I tapped the tape to her back and she was stuck. I folded the tape piece around her and she wasn't going anywhere. 

-Ditto for the cucumber beetles. If you happen to see one of them, tap it on their back. I think that's the quickest way I've dealt with those guys so far. 


{Adults}

Until now, the most successful way that I've managed our infestation was to mist down the plants with a little peppermint oil diluted in a sprayer of water. It acts more of a temporary repellent and you have to do it frequently to give your plants a fighting chance. 

But this weekend,  On The Old Path shared on her Facebook page a link showing how to kill the squash bugs (and perhaps the cucumber beetles) dead on the spot using a biodegradable detergent dish soap. The soap works by suffocating the beetle within moments. It worked wonderfully for the squash bugs, not so much for the cucumber beetles,  but that's ok because I prefer to remove the beetle from the plant before spraying it to make certain that the plant isn't affected in any way and cucumber beetles will fly before allowing that to happen. 

One word of warning with both of those methods, I have had plants suspiciously turn grey, wilt, and die the day after spraying. What was odd was that while one was affected, the other plants weren't. Another reason to remove the adults before spraying with dish soap. 


The most successful way the Lord has been managing our infestation is by means of spiders (the garden is full of them!), toads, and frogs!!

Of the 4 acorn squash that sprouted, 2 have survived until yesterday from the destruction of these pests. One I was having to manage with sprays until it was discovered grey & wilted this morning which leaves us with just one.

And it was under that one large beautiful acorn squash plant that I found a toad the size of a baseball! He was getting fat on all these beetles!

Then yesterday while searching for cucumbers who should I see peeking at me from the middle of the trellis, but a bullfrog. How glad I am that we put in the pond which encouraged their breeding and next time one of the kids brings me a toad discovery, I'll be having them tuck him under the hay mulch next to a zucchini plant!


I feel that with a little diligence, my squash plants just may have a fighting chance this year! And I hope that yours will now too!

How is your squash beetle war going this year?

20 June 2013

Wool Eater Blanket - A crochet video by Sedruola Maruska


Written Instructions:


Wool Eater Instructions


Crocheted Wool-Eater Blanket

© 2007 Sarah London. All rights reserved. No part of this publication may be reproduced, transmitted, transcribed, scanned, stored mechanically or electronically, or translated into any language without prior permission of Sarah London.

8 ply wool

4mm crochet hook

2731470532_cb607abfbf

Ch 6, join with a slip stitch to form a ring.

1st round: * ch 5, work 4 dtr (wrap yarn around hook twice) into the ring, ensure to leave the last remaining loop of each stitch on the hook as shown in the photo below,

2730631921_b80653f305

now, yarn over and pull the yarn through all 5 loops on the hook.

{1 cluny group made}.

2730631925_1700e9489b

ch 5, slip stitch into the ring.

Rep from * 3 more times. 

{4 cluny groups made}.

2730631929_0f6c4a6946

Round 2: * ch 2, work 12 dtr into the top of the cluny group, ch 2, slip stitch into the slip stitch of the previous round.

Rep from * 3 times.

Fasten off.

{4 corners made}.

2730631935_07e7a15ae3

Round 3: Join new colour in between any 4th and 5th dtr of the previous round.

Ch 5, working from the back around to the front of the stem of the dtr of the previous round, and out at the back, make a cluny group over the next 4 dtr, ch 5, slip stitch in between the 8th and 9th dtr of the previous round, ch 5, work a cluny group of 8 dtr over the next 8 dtr of the previous round, ch 5, slip stitch between the 4th and 5th dtr of the next 12 dtr corner group.

2730631945_628f19a42c

Continue working round in this manner, finishing with a slip stitch into where the contrast yarn was joined at the beginning of the round.

2731470502_c279c23d5d

Round 4: Ch 2, 12 dtr into the top of the 4 cluny group, ch 2, slip stitch into slip stitch of the previous round, ch 2, 8 dtr into the top of the 8 cluny group, ch 2, slip stitch into slip stitch of the previous round.

Continue working round in this manner, finishing with a slip stitch.

Fasten off.

2731470526_105b395ee2

Take a look at the Flickr group:

http://www.flickr.com/groups/795003@N25/pool/

Sometimes Your Yarn Gets Eaten

954606_533065593439993_538997559_n
We'd like to thank Benita Campbell Mann for posting not only this great photo in her search for the name of the stitch, but also finding an online tutorial on how to make the blanket.    It is a beautiful work of crochet art and we bet it is warm, too.   
Don't you love, too, how it is so colorful!   
It's called a "Wool Eater Blanket".   Benita gave this link to a YouTube tutorial:  http://www.youtube.com/watch?v=edVGSzaGhKc.  
One of the nice things about social media is that we help each other out.  Sandy, one of our readers, also commented and gave this link for another source of instructions: http://sarahlondon.wordpress.com/2009/08/25/wool-eater-instructions/
We're sure there are other sources for the pattern and instructions on how to make it.   We just know that it is beautiful!    Thanks to everyone who has helped us discover "wool-eaters". 

Using Stamp-A-Ma Jig


Magnet Platform for the Big Shot


19 June 2013

Graduation Gift Card - by Mary Jo Price-Williams at Techno Stamper blog AND a 2nd one by Dawn Griffith at Dawns Stamping Studio


Do you have a Grad to celebrate?

This week on Latenightstampers  (actually the next two weeks since the challenges are running for two weeks over the summer.) the challenge is Party Time!  What better reason to PARTY than to celebrate someone's graduation?!  This fun origami type card has been around the internet for years but it is a fun one and much easier now that we have the diagonal score board!  Our school colors are Maroon and White as you can probably figure from the photos below...


I love that it holds a gift card or money!  So fun and easy too!

Here are some quick directions for making this fun card.
 Begin with a piece of card stock that is 9 3/4" by 4 1/4" .  With the regular score board (straight lines) place you card stock so that the 9 3/4" edge runs along the top of the score board.  Score from top to bottom at 5 1/2"   Now you will want to change you scoreboard to the diagonal board.  Again lay your  card stock so that the 9 3/4" edge runs along the top of the score board.  Score from the 2 1/8" mark straight down until you are off the paper--this line will cross over the straight line you did before.  Flip the card stock over so that the opposite 9 3/4" edge runs along the top of the score board and do the same score from the 2 1/8" mark.  Now you will change your card stock so that the 4 1/4" edge is at the top of the card and score from the 2 1/8" mark again.  This line be from the center of the top and come down to meet the first score line.  Flip the card stock to get the same score on the opposite side. You card stock should now look like the image below.  You will cut out the grey areas and then fold on all scorelines until it lays like shown in the above pictures.  Clear as mud???  Probably should do a picture or video tutorial but I am betting there are tons out there is you need to see them.  Just Google Grad Origami card. Click on image below to make it bigger. 


After your card is folded you will need a square piece of card stock for the hat layer that is 2 3/4" square--and the insert is 4" by 3"--be sure to only attach the insert on the two sides and the bottom so you can insert money or gift card. 


This next is from Dawn Griffith's blog...

Graduation Spring Gift Card video

Graduation Spring cards front
Hi Stampers :
Here are the supplies we will be using today :
Baked Brown Sugar  classic ink#131174
Baked Brown Sugar card stock #131296
  • cut at 4 1/4" x 9 3/4"
Black card stock # 121045
  • cut at 2 3/4" x 2 3/4"
Whisper White card stock # 100730
  • cut (2) at 3" x 4"
Blue Ribbon stamp set
  • (w)#131964
  • (c)#125981
Sassy Salutations stamp set
  • (w)#132070
  • (c)#126707
Really Good Greetings  stamp set
  • (w)# 130330
  • (c)# 130333
Graduation Spring gift cards
  • 2 3/8" Scallop Circle punch #118874
  • 1 3/4" Scallop Circle punch # 119854
  • 1 3/8" Circle punch #119860
Sticky Strip # 104294
Dimensionals # 104430

And Dawn's how-to video:


18 June 2013

Open Ended Envelope With Gift Card - by Marti Crapo


Open Ended Envelope

The open ended envelope is just great to use. I got the inspiration from Jackie Topa and the Stampin’ Up! Catalog – you’ll find this envelope on page 137 or page 97.  Try using just the envelope in your scrapbook or This and That books or for postcards and gift tags.


open end envelope
You can also use this envelope to hold a great gift card like this one – add a gift card or money for a great birthday or wedding gift.  If you in direct sales like me – use it to hold your business card, a coupon or a punch card for free merchandise! HOW FUN!
open end envelope with card

I used Polka Dot Parade Designer Series Paper (126902) to make this envelope. Those of you who are on my newsletter list will get a free template and instructions for making the envelope– be sure to sign up today.
The Stamp Set I used is Oh, Hello – a wonderful set (130733) — so versatile.

130733L
The colors I used are Rich Razzleberry, Summer Starfruit and Pear Pizzazz. I colored the rose with the Stampin’ Write marking pens. On the card I used only Stummer Starfruit and Pear Pizzazz. On the envelope added a bit more color with Always Artichoke and Rich Razzleberry. Which do you like best?
The best part is the pocket for the money (or gift card, business card or coupon)
Stamp the oval on whisper White card stock and place the card stock in your Stampin’ Trimmer
open end envelope - making slit in card
You can see how the ruler is easy to use for a guide and the arrow on the cutting blade is clearly pointing to the right spot on the oval. Just cut from 1 1/2″ to the 3″ mark, moving the cutter to the left. EASY PEASY
open end envelope - show slit in card
Attach this piece to the Rich Razzleberry card stock with snail adhesive on the sides of the oval. That leaves the pocket open to hold your goodies.
Get Creative and Design another one.
Here’s one using Epic Day This and That Designer Series Paper (130814)  and the great images using the Quartre fancy shape
  • Modern Mosaic Embossing Folder 129984
  • Mosaic Punch 131267
  • Mosaic Madness Stamp Set (130249 clear, 130246 wood)(Note: there is a great bundle price on the stamp set and punch – 15% off if you bundle 132733 clear and 132734 wood)

open end envelope 2 with card
I’ll post more about how to make this card tomorrow including the great Mosaic Punch label shape and a punch tip. SO be sure to sign up to follow my Blog – the link is on the top right of the page – right below the newsletter sign up. Hope you’ll be back to read more


10 June 2013

Open Ended Gift Card Envelope - by Jackie Topa (Addicted to Stamping)


Open Ended Envelopes

If you've had a chance to look at the new Stampin' Up catalogue you'll notice a few samples of open ended envelopes like this one. They're very simple to make and you can follow this formula to make one any size you need. It's a great way to use up that retired DSP. Multiply the with of your card by 2 and add 1-1/2". This is how wide your DSP or card stock needs to be. For an envelope with 1" flaps measure the length of your card and add 2-1/4". This is how long your DSP or card stock needs to be. Score 1" across the top and bottom as well as 1/8" on each side of the card. If this is as clear as mud I've included a video tutorial. Open Ended Envelope


09 June 2013

Butterfly Card Tutorial and Video - by Kelly Acheson


   103_0010
Here's the inside SURPRISE part of the card!!!  I just love it!
IMG_0038
.
And a little detail so you can see the window sheet with the butterflies!
.
IMG_0037
.
Enjoy this step by step video to show you how super easy this card is!!!


Stamps: Swallowtail; Papillon Potpourri; Express Yourself  Ink:  VersaMark; Coastal Cabana; Baked Brown Sugar  Paper:  Whisper White; Coastal Cabana; Baked Brown Sugar; NEW In Color Paper Stack DSP; Window Sheets (Acetate)  Accessories:  Bitty Butterfly & Elegant Butterfly Punches; Iridescent Ice Embossing Powder; Heat Tool (Card stock dimensions are listed at the end of the video)

Screen Shot 2013-06-08 at 8.36.31 PM
Screen Shot 2013-06-08 at 8.36.53 PM
Screen Shot 2013-06-08 at 8.45.25 PM

Screen Shot 2013-06-08 at 8.35.05 PM
Screen Shot 2013-06-08 at 8.35.19 PM
Screen Shot 2013-06-08 at 8.35.31 PM
Screen Shot 2013-06-08 at 8.35.46 PM
Screen Shot 2013-06-08 at 8.35.57 PM