I was pointed to this video clip this morning, and want to pass it along. Nothing can beat Mother Nature... thank you God.
Steve Goddard's video

04 May 2010
Bloomin' Beautiful Crimping Tutorial
Thank you Lee Conrey from Stampingleeyours
I finally had a few minutes to do a tutorial on this card. This card features “Bloomin Beautiful” from Stampin’ Up! I’ve had so many requests to share this so I hope you enjoy it.

Finished Card
Crimping Technique………………….
First you need a piece of card stock measuring 4’ x 5 1/4”…you will need to have this piece marked on the center edge of all sides as seen below. The center is 2” on the short sides and 2 5/8” on the long sides. Mark with pencil so you can erase

Then you want to score from a long side to a short side as seen here marked by a broken line (dashes).

and score….

Once you have scored it you will need to fold it in… like this;

then you will place it folded into your crimper… as shown below

try and keep it folded

Run it though the crimper and don’t despair when it hasn’t totally crimped in the center. Simply open and crimp again from both sides to the center to get full crimped coverage.

like this….

do this from both sides to fill in the center and you’re done!!!! Now that wasn’t hard was it?
Now to get the cute little diamond shapes for the inside of the center…I crimped another piece and cut the center out (large diamond) and cut it down to where I wanted it. Make sure to cut equally on all sides to make your templates and then trace to cardstock. That’s it!!!
03 April 2010
Brayering and Sponging Technique
Saturday, April 3, 2010
Tutorial: Capture the Waves… Brayered and Sponging Surfer
You asked for it… and I finally had time to dedicate to recreating the Brayered and Sponged Surfer Card which I posted back on March 13th HERE.
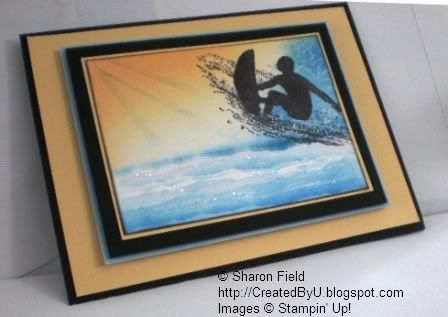
The good news is… this card was as much fun to create the second time as it was the first! I hope you’ll try the technique, and enjoy it as much as I have! And, I have to thank my wonderful teacher (again)… Michelle Zindorf.. you rock!!
Supplies -complete list at end of tutorial…

First things first, you will want to protect your work surface with a pad (or couple sheets) of grid paper!
Next, load up your brayer with Barely Banana Classic Ink. Beginning OFF the cardstock, quickly brayer across the corner towards the middle diagonal of the card stock. Repeat until desired depth of color has been achieved.
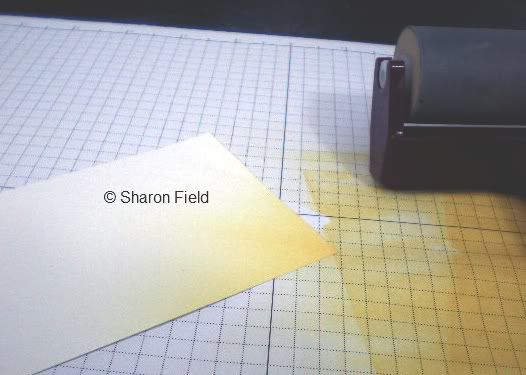
Ink up your brayer with Apricot Appeal Ink and repeat the corner to diagonal brayer process. Do this only ONCE.
Next, use 1/8 of a stampin’ sponge and ink with Apricot Appeal Classic Ink. Gently pounce the inked corner to add color. Use a circular motion to create a sun-like image.

Now, take two layers of post-it notes, and form a diagonal from the center of the brayered, across the card stock.
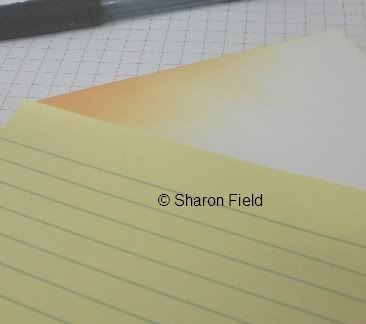
Ink up a fresh 1/8 piece of sponge with Bashful Blue Classic Ink, and gently scrub across the edge of the post it note. (Lift the post it note and peek to make sure the color is what you want before completely removing the post it note.)
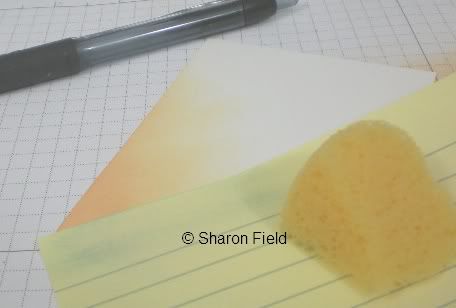
Repeat this process to add additional diagonal rays of color. This picture shows two rays.. but I actually added three.
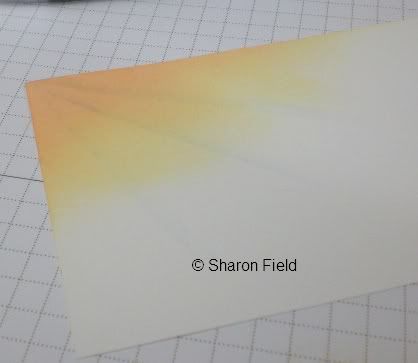
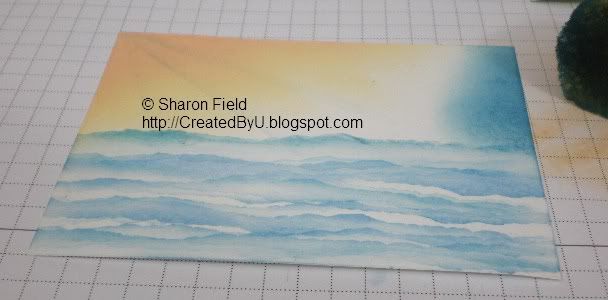
Take two fresh post it notes (leave them stuck together) and tear a jagged edge along the sticky edge of the note. Turn your work sideways, and attach the post it note so that the brayered part is protected.


Working in the other direction, you will now move the post it note DOWN, approximately 1/8” to 1/4” at a time and sponge with Bashful Blue Classic Ink. Move the jagged edge right and left, and sometimes angle it to give your surf an uneven and realistic appearance.
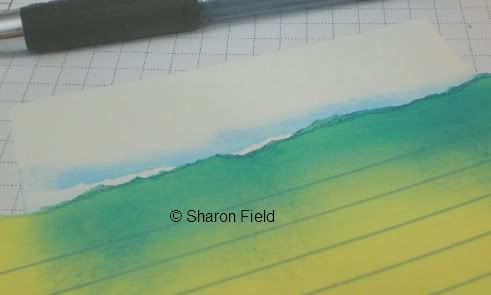
Now you will repeat this process several times alternating Bashful Blue Classic Ink, Not Quite Navy Classic Ink, and occasionally Tempting Turquoise. Each time you will vary the positioning of the post it notes, ink wider lines, aligning on an angle, and/or leave gaps of white (caps) between the inked lines.
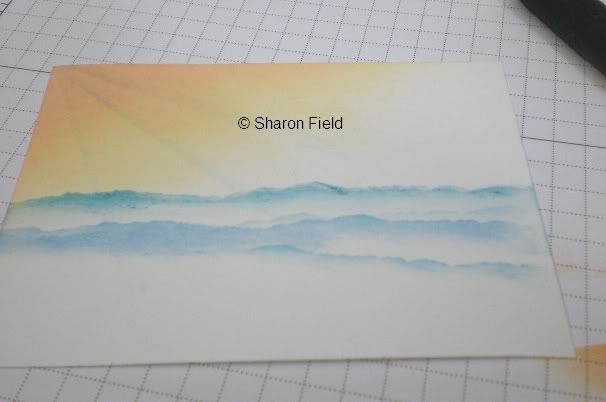
Repeat this process until the entire lower half 003of the card stock is filled with your waves.
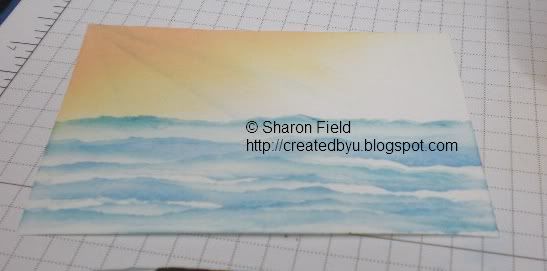
Ink the Extreme Surfboard Image with Basic Black Classic Ink, and add to upper right corner of card stock, and then use a Signo White Gel Pen to add random splashes to the water surrounding the surfer image.
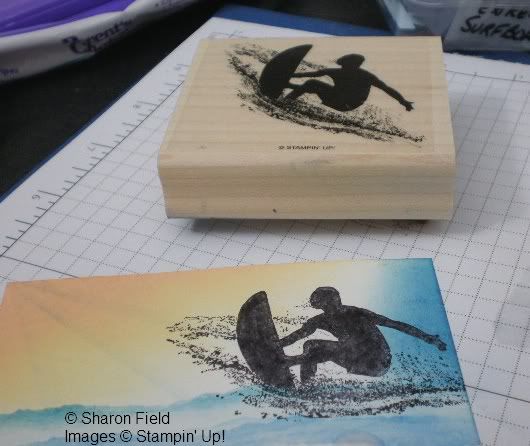
Note: if your surfer image is not as dark as you would like, use a re-inker (or the lid of your basic black classic ink pad) an an aqua painter to fill in the missing or lighter areas.)
Use a sponge or sponge dauber to darken the edges of the card stock with basic black classic ink. And next, you will simply add glue to the white areas of the waves, and sprinkle with dazzling diamonds!

Assemble with coordinating card stock colors, and you’ll have a beautiful one of a kind card!
Stampin’ Supplies Used on Today’s Card:
Stamps: Extreme Surfboard #115173 $8.95
Classic Inks@ $5.95 each:
- Not Quite Navy #103008
- Bashful Blue #105209
- Tempting Turquoise #100814
- Barely Banana #101170
- Apricot Appeal #105218
Accessories:
- Brayer (soft rubber) #102395 $12.50
- Stamping Sponges #101610 3qty $3.95
- 2-Way Glue Pen #100425 $3.50
- Dazzling Diamonds #102023 $4.50
- Whisper White Card Stock #100730 40sheets $7.50
- Grid Paper #102787 (100 sheets) $9.95
- White Signo Gel Pen @105021 $3.95
- Post-It Notes
From: Sharon Field
01 April 2010
30 March 2010
Making a Palm Leaf Cross - for Palm Sunday
How to Make a Palm Frond Cross

Steps


Making a Palm Leaf Cross - for Palm Sunday
How to Make a Palm Frond Cross
originated by:Anonymous
On the Sunday before Easter, many Christians celebrate Palm Sunday. Recalling the entrance of Jesus into Jerusalem, churches distribute palm leaves in remembrance of people who waved them and carpeted his path with them. One of the things you can do with these palm leaves is to fold them into crosses. These are great to give out as little gifts or hide as secret presents!
Steps
- Gently tear/snap palm blade off stalk.
- Hold the blade pointy side up.
- 3Fold the blade to the right to make a 90° angle.
- Fold down once.
- Fold down again. You should now have a small square shape.
- Push the pointy end around the back of the square and fold over.
- Take the pointy end on the left, loop towards you without any turns, and:
- Push then pull it through the square until it comes out of the square.
- Pull through all the way.
- Hold onto the square with one hand and tug on the fat and pointed ends to secure it. You should now have a locked 90° angle.
- Take the pointy end and turning it towards yourself, push through square. This is the head and base of the cross.
- Turn 45° to where the pointy end is down and the fat end is to your right.
- Flip it so the fat end is on your left.
- Take fat end and loop towards you into the square. Pull until about the same length as head.
- Turn it over to where the straight fat end faces left again.
- Take fat end and loop towards you into the square. Pull until about the same length as other two parts. Be sure to tuck it inside the other loop so you can't see it.
Subscribe to:
Posts (Atom)