The card features the new face set called
Snow Cuties (PK-500 & PK-501). Instructions for making this card is below the blog hop button. I'm also excited that my design is one of the new CottageCutz dies called Herby. You can see him
HERE. There are so many other AWESOME new halloween dies. You just have to see them all
HERE.
[PKS = Peachy Keen Stamps (
PKS Snow People Faces Stamps )

INSTRUCTIONS:
All punches used are Stampin’ Up!
(sorry, the pictures look a little "yellow", not sure what happened)
Snowboy:
Punch 2 1/2” Circle, 1 3/4” Circle & Ornament in textured white.
For arm, punch half of the Medium Oval, then line up the Large Oval over the top of the punched hole and punch the arm as shown. Round out the sharp edges of the punched arm. Punch 3/4” Circle for one hand.
Punch 1 1/4” Square in black, Word Window in black and one third of the 1 1/4” Square in a color of choice for the hat band. Use the Crop-a-dile to punch 3 of the smallest circles for the holly berries. Cut 2 small rectangles. Use a 1/4” circle and punch around the outer edges to create the holly leaves. Punch 3 of the 1/4” Circles for buttons and the smallest heart from Heart to Heart for the chest.
Stamp the snowboy face onto the ornament using the Snow Cuties 1 1/8” stamp (PK-501). Sponge the edges of the white pieces with soft sky ink. Attach the 1 3/4” Circle at the top of the 2 1/2” circle with dimensionals. Attach the head to the body with dimensionals. Glue hat band onto hat. Clip away a little on each side at an angle so that the square is narrower at the bottom. Attach the word window onto the square with dimensionals. Glue holly leaves and berries onto hat. Attach hat to head with dimensionals. Attach arm and heart with dimensional. Glue on buttons.
Snowgirl:
Punch 1 3/4” Circle, 1 3/8” Circle & 1 1/4” Circle in textured white.
For arm, punch half of the 3/4” Circle, then line up the Small Oval over the top of the punched hole and punch the arm like you did for the snowboy. Round out the sharp edges of the punched arm. Make 2 arms.
Stamp the snowgirl face onto the 1 1/4” Circle using the Snow Cuties Assortment stamps 1” size (PK-500). Sponge the edges of the white pieces with soft sky ink. Attach the 1 3/8” Circle at the top of the 1 3/4” circle with dimensionals. Attach the head to the body with dimensionals (tilt the head towards the snowboy). Attach the arms and heart with dimensionals. Attach snowgirl to front of snowboy with dimensionals. Attach snowboy hand onto snowgirl shoulder with dimensional.
Card Assembly:
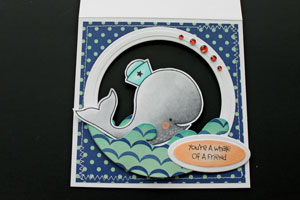
For the basic card assembly, follow the instructions for a Tent Card in the SCS Resources Section HERE. For card base, cut 5 1/2” x 11” baha breeze cardstock. For inside of card, cut 5 1/2” x 4”. I used a retired Stampin’ Up! DSP called Ski Slope. The new Stampin’ Up! DSP called Candy Cane would be a great substitute. Cut striped paper for the front 5 1/4” x 5 1/4”. Cut snowflake print for inside 5 1/4” x 5 1/4”. I used the Nestabilities Petite Circles (largest) and the Nestabilities Scallop Circle (largest) for the window on the front. The greeting from SU! Bright Christmas is stamped in real red and cut out with the Nestabilities Mega Ovals. You can’t see in the picture, but the words are outlined with a stardust pen to add shimmer. Card is embellished with the SU! Red satin ribbon.
The Tent Card Instructions, from Splitcoaststampers site:
Tent Card
by Beate Johns
Create a standing card with a window.
Supplies
- One 4 1/4" x 8 1/2" piece of cardstock
- One 4 1/4" x 4" piece of cardstock, for the card stand
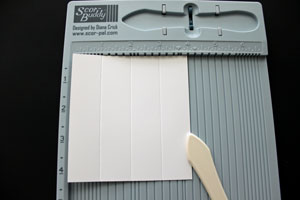
- Scor-Buddy™, or other scoring tool
- Scor-Tape™, or other strong adhesive
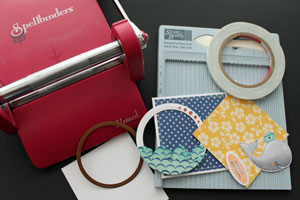
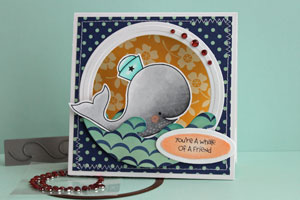
- Two 4" squares of patterned paper, (October Afternoon's Seaside used here)
- Wizard™, or other die cut machine
- Shape dies, (Classic Circle Nestabilities™ used here)
- Stamps, (The Cat's Pajamas A Whale of a Time used here)
Step-by-Step
-
Step 1
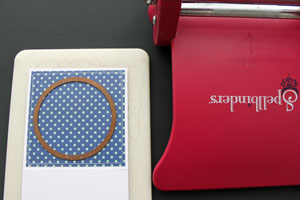
Adhere one of the 4" patterned paper squares to the front of the card (optional).
Unfold the card and place the shape die on the card front.
-
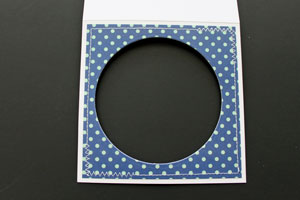
Run opened card with die through the die cut machine to cut a window.
-
Step 2 (Optional)
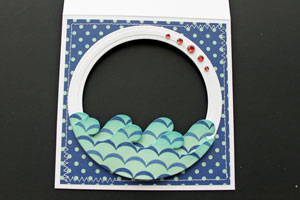
Adhere a frame around the window.
Hint:
Cut the window on the card one size bigger then the opening of the frame. (The frame was cut with two Classic Circle Nestabilities™.
The waves were cut with The Cat's Pajama's wave die.)
-
Step 3
Stamp, color and cut out an image. Adhere or suspend it from the window.
-
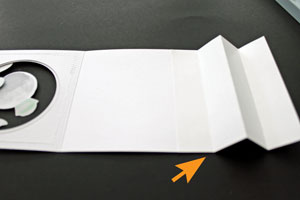
Step 4
Score the 4" x 4 1/4" piece of cardstock at 1", 2" and 3" on the 4" side.
-
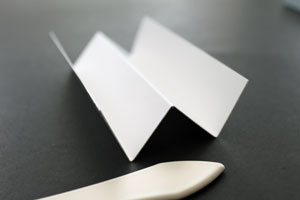
Step 5
Fold the score lines in mountain/valley style. The center fold has to go up (mountain), the two outer folds have to face down (valley).
-
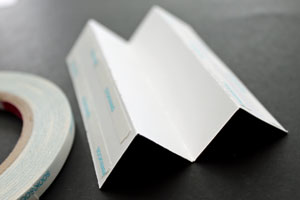
Step 6
Apply adhesive to the outer panels.
-
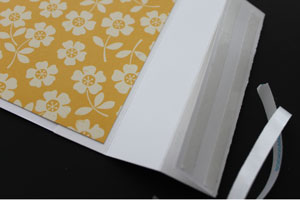
Step 7
Line up the first fold of the folded cardstock with the bottom of the back of the card.
Hint:
Make sure the second fold of the folded cardstock piece will point up.
-
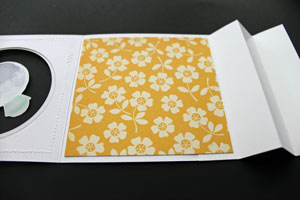
Step 8
Adhere the second 4" square of patterned paper on the inside of the card.
-
Step 9
Remove the adhesive liner on the other edge of your folded cardstock.
-
Adhere the bottom of the card front to the edge of the fold of the card bottom.
-
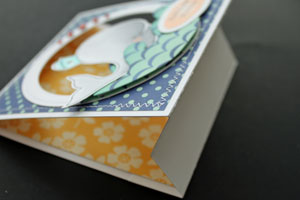
Step 10
Your tent card is done.


No comments:
Post a Comment